Installing RouterOS on Virtual VMware Workstation
You don't always have a physical Mikrotik router with you, but need to learn RouterOS. In this case, you need a way to practice with RouterOS.
VMware workstation can help!
This can create a virtual machine on your existing PC, where you install RouterOS and practice MikroTik basics.
1. Any VMware Workstation Software, like version 10 or 11
2. An ISO file of RouterOS of any version
2. Winbox for accessing MikroTik RouterOS
First, install VMware and open it.
Now, click on "Create a New Virtual Machine"
On the popup window, select "Custom"
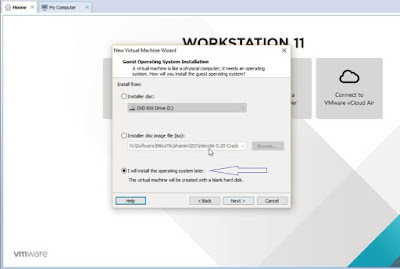
On the next window, select the last option as indicated in above photo.
On the next one, select " Other" for both as we don't know which version of RouterOS you are installing yet! right.
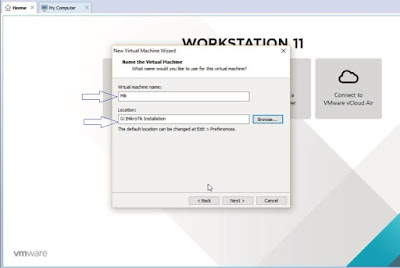
Now, give your virtual machine a Name. In my case "Mik" and select a location on your drive. It's better to select a drive other than C drive.
Allocate 512MB of RAM for your virtual machine.
Next, select Bridge Networking
N.B: Some of steps are not mentioned in this article. If popped select the default option.
Now, select the folder you previously created on your drive
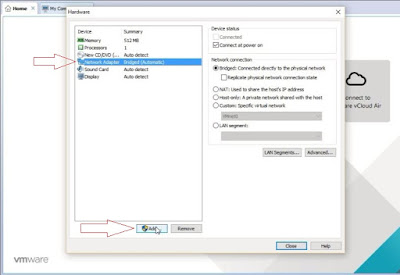
On next window, click on "Customize hardware"
Now, click on "Add"
From the left, select "Network Adapter"
Now, look on the main control panel
Select the machine you just created. Now it's time to select the ISO file . Upon selecting the machine, on the right side, select the CD/DVD and select the ISO file.
Now, hit the play button as indicated on above.
It will give you the installation wizard, Fullscreen it. Otherwise, keyboard will not work.
Now, press "a" on your keyboard for selecting all packages
Press, "i" for install.
It will promt for keeping old configuration. Press "n" and for continue press "y".
It will take some time, don't panic. After successful installation hit "Enter" for reboot.
After installation. Your default username "admin" and no password, that means black.
Using the "software key" you can purchase your RouterOS license. It's not mandatory for our purpose.
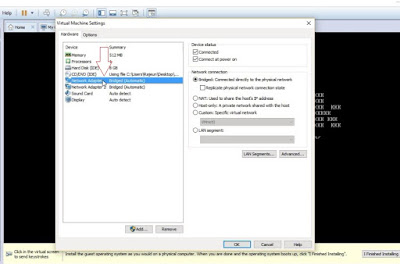
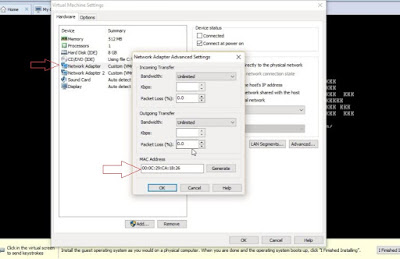
Our setup is not yet finished. Remember the Bridge mode. Now select the Network adapter you created earlier.
Now, select the "Custom" option. From dropdown menu, select VMNet with something written on the right. Do it for another Adapter and select the other VMnet.
Now from adapter list, click any adapter. From the pop window, click "advanced" and you will be presented with a MAC address. Copy the MAC address.
Now, time for the magic of Winbox. Start the Winbox application, put the MAC in "Connect To" section. Put "admin" as Login and leave the password field black.
Here, the interface of a MikroTik router interface.
Now, the above instruction can be fund on this YouTube video.











No comments:
Post a Comment